Step 1
Use the Rounded Rectangle Tool to draw the shape shown below. Change the radius of the corners by holding the up or down arrow while you draw the shape.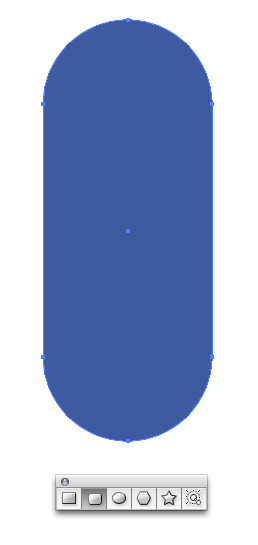
Step 2
Overlap the rounded rectangle shape with another rectangle. In the Pathfinder select Subtract from Shape Area followed by clicking Expand.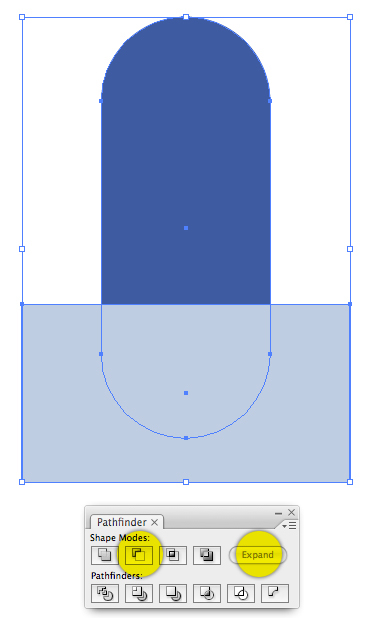
Step 3
This is the shape you’ll be left with. Use the Direct Selection Tool (A) to adjust the bottom two points if you need to make your shape taller.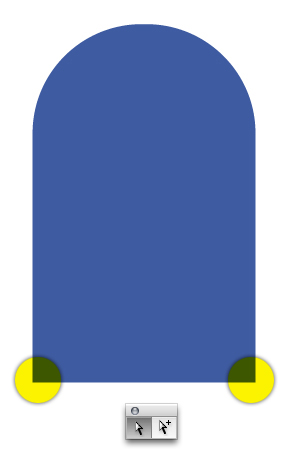
Step 4
Draw another rounded rectangle for the base of the popsicle. Make sure the corners are rounded enough, as shown below, which gives the popsicle a fuller look.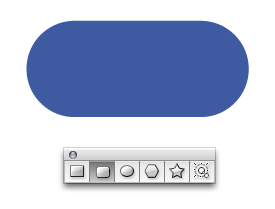
Step 5
Layer the two shapes on top of each other. Ensure that the base is the same width as the top part of the popsicle. To make the stick simply copy and paste the top part of the popsicle and rotate or reflect the orientation so it’s upside down.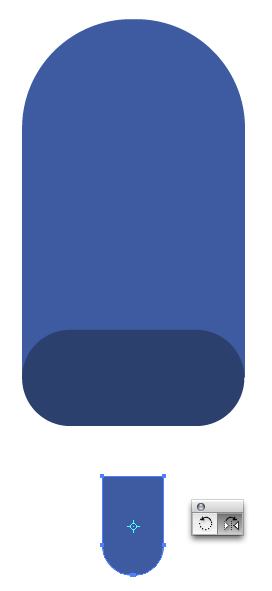
Step 6
Give the stick a subtle gradient. Select all of the objects and click Horizontal Align Center in the Align Palette.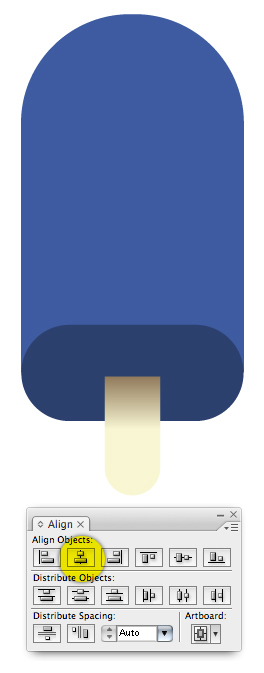
Step 7
Duplicate the stick and give it a subtly darker gradient.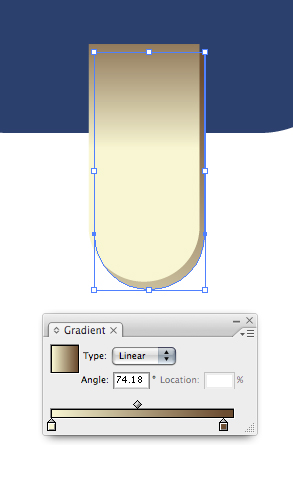
Step 8
It’s easy to give the popsicle realistic shadows and highlights using a few simple shapes. Using the Pen Tool (P) draw the tall white shape as shown below. Ensure that your shape overlaps into the base of the popsicle, this way your shadow or highlight will definitely cover the whole top area of the popsicle.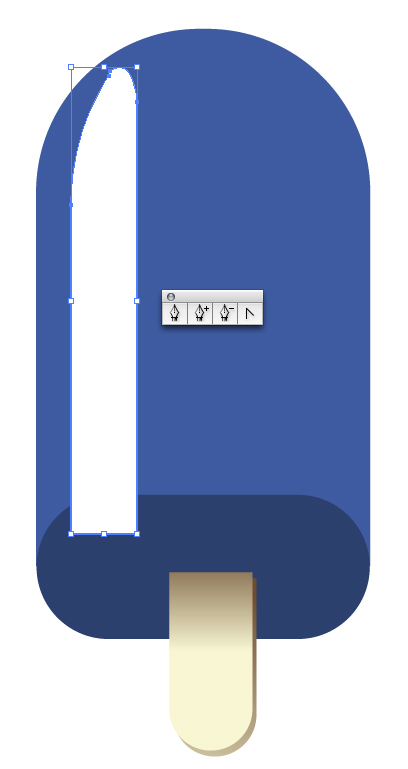
Step 9
In the Transparency Palette select Multiply and change the Opacity to about 60%.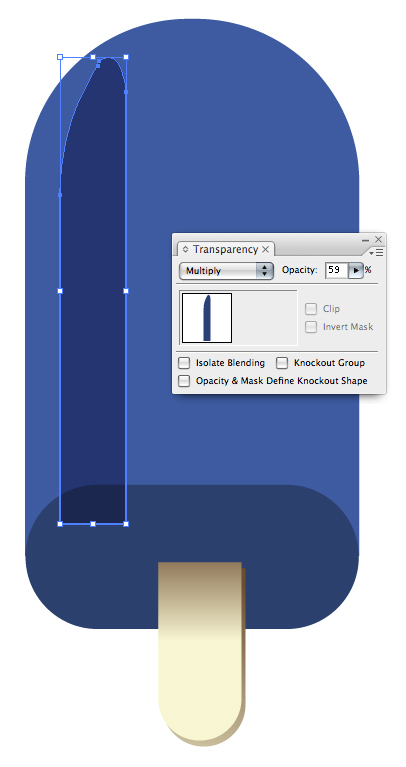
Step 10
Go to Effect > Blur > Gaussian Blur… Enter a number that looks good to you and click OK.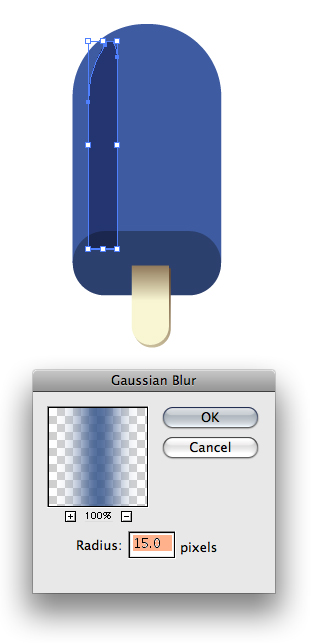
Step 11
Repeat the last 3 steps to make other shadows and highlights. When making highlights, leave the blend on Normal and the Opacity at 100% in the Transparency Palette.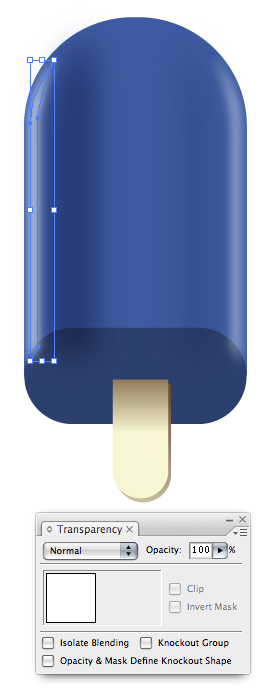
Step 12
To make a highlight for the bottom edge we’ll first duplicate the shape and make another copy slightly higher than the other. In the Pathfinder Palette select Subtract from Shape Area followed by clicking Expand.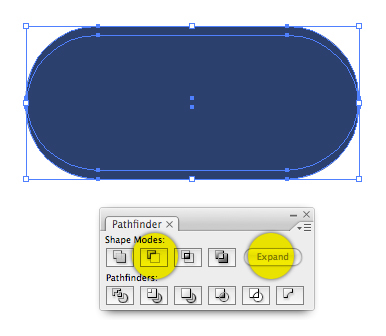
Step 13
Here’s the shape you’ll be left with.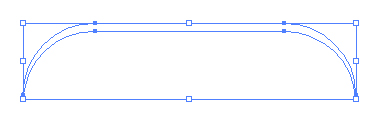
Step 14
Give this shape a blur and place it at the bottom edge of the popsicle.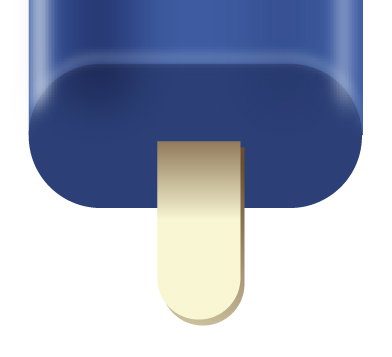
Step 15
Give the base a gradient so it looks as though the bottom is in shadow.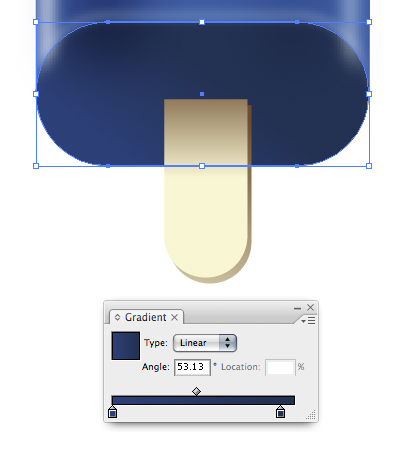
Step 16
Small details go a long way. Add a subtle inner glow to the bottom of the popsicle by going to Effect > Stylize > Inner Glow… Next to Mode select Multiply, change the Opacity to about 25 and select a Blur that looks good to you. You can also select a color more similar to your popsicle color (but a little darker) to help the shadow blend even more, then click OK.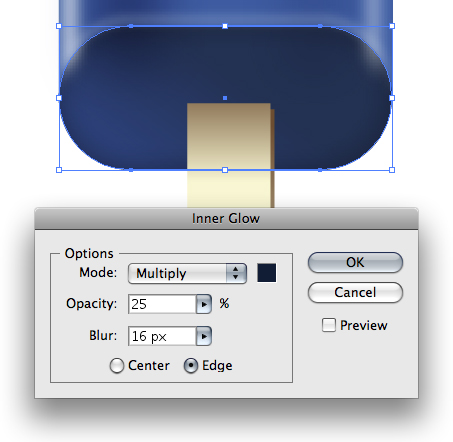
Step 17
Select the stick and base and bring them to the front of all the other elements by going to Object > Arrange > Bring to Front.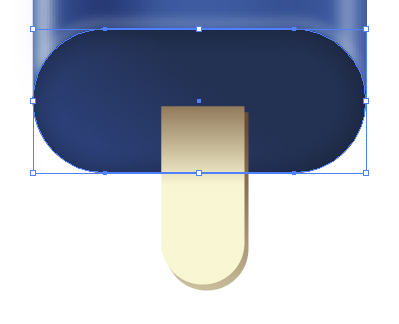
Step 18
Here’s what your illustration should look like right now.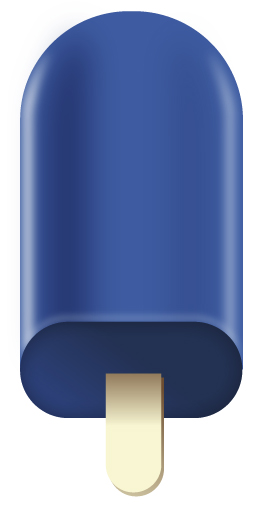
Step 19
We’ll add a whimsical bite detail by first drawing a few circles using the Ellipse Tool (L).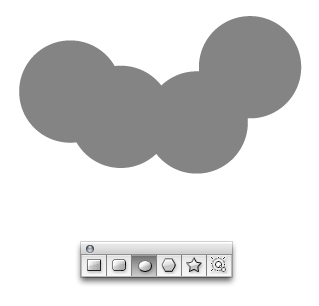
Step 20
Use the Pathfinder to merge the shapes by selecting Add to Shape Area followed by clicking Expand.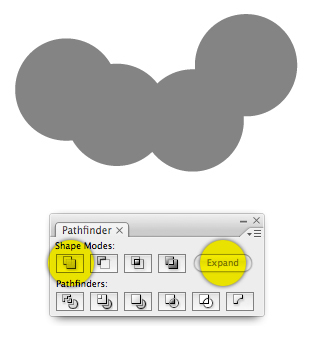
Step 21
Place the oval shape over the top edge of the popsicle. Select the oval shape and only the top part of the popsicle, then select Subtract from Shape Area, followed by clicking Expand in the Pathfinder Palette.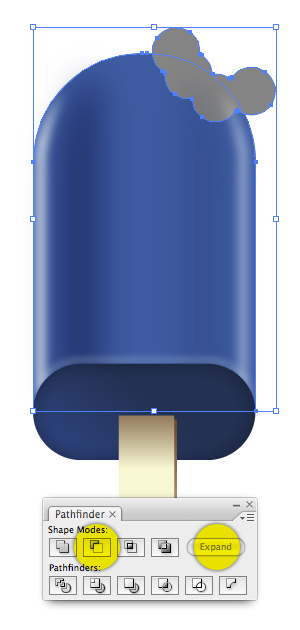
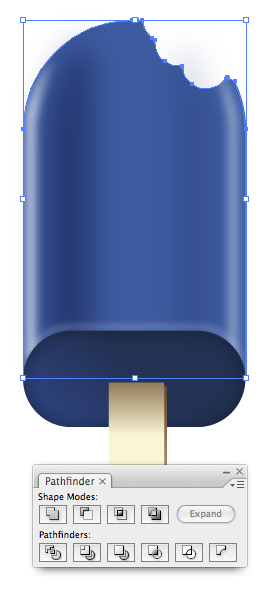
Step 22
This is what you’ll be left with.Note: Make sure you only select the two shapes in the prior step or your result will not look like this.
Step 23
Using the Ellipse Tool to draw an ellipse and give it a simple gradient that is darker at the center.
Step 24
Place the ellipse behind the popsicle and rotate it slightly to fit the curvature of the popsicle’s edge.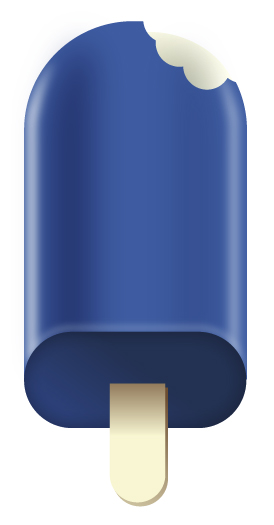
Step 25
Next we’ll make a drop shadow for the main part of the popsicle. Copy and paste the shapes shown below. Select the shapes and in the Pathfinder Palette select Add to Shape Area followed by clicking Expand.
Step 26
This is what you’ll be left with. This shape will fit perfectly behind the popsicle.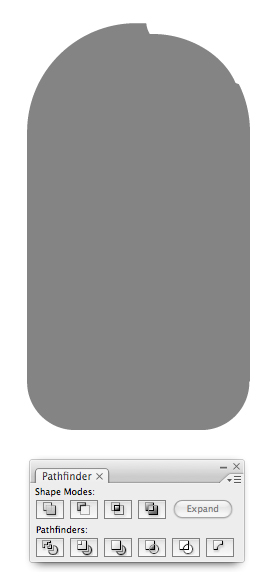
Step 27
Give the shape a drop shadow by going to Effect > Stylize > Drop Shadow… Leave your X and Y Offset at 0 and change the Blur to whatever you like. Click OK.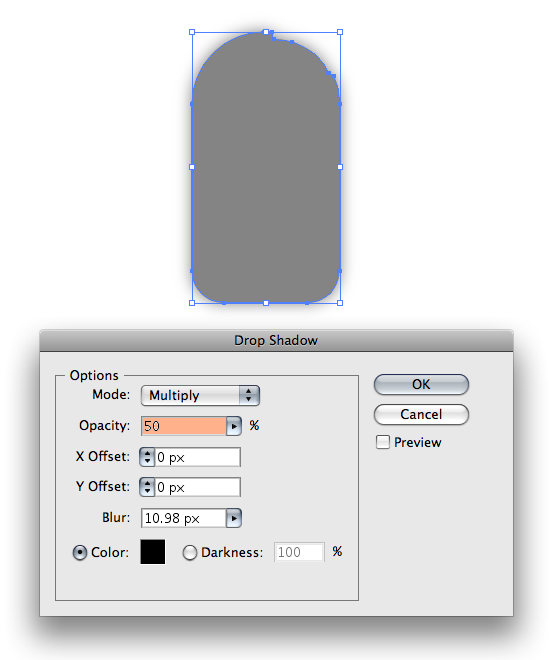
Step 28
Move the shadow behind the popsicle.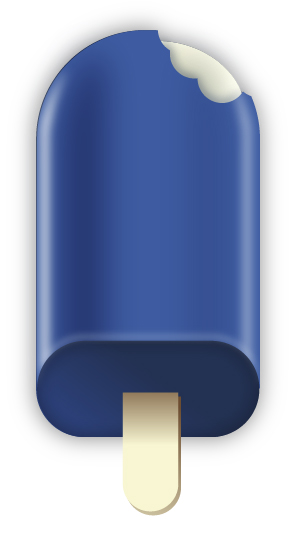
Step 29
Next we’ll make a reflection. Draw an arbitrary shape over part of the popsicle.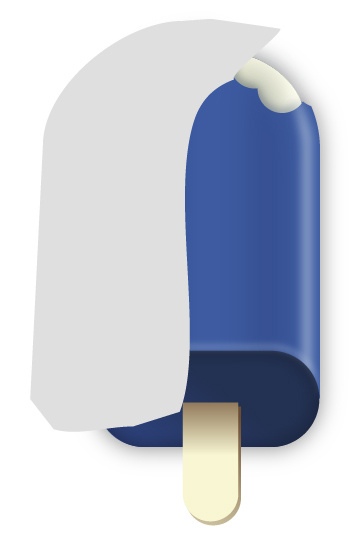
Step 30
Copy and paste the shapes shown below before you proceed, this way you’ll be certain that you won’t mess up or loose any of the work you’ve already done. Select the two shapes below and click Intersect Shape Areas followed by clicking Expand.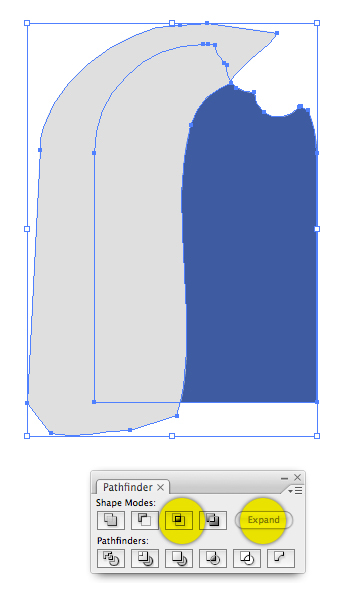
Step 31
Now you have a perfectly trimmed highlight that you can place over the popsicle.In order for the next steps to work you must use black and white (and not color) as indicated. Give the highlight a white fill. With the highlight selected in your document, go to the Transparency Palette and double-click the area highlighted in yellow.

Step 32
After your double click the area in the Transparency Palette your shape will disappear. Make sure the black square on the right in the Palette is selected…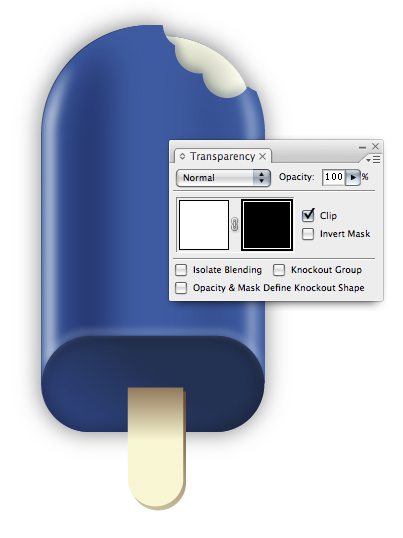
Step 33
Use the Rectangle Tool (M) to draw a rectangle over the popsicle. Now, your highlight will reveal itself again.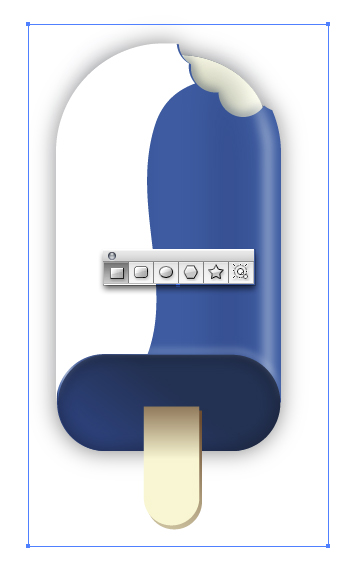
Step 34
In the Gradient Palette add a black and a white point then fill the rectangle shape you just drew with the black and white gradient. It’s important that your colors in the gradient Palette are made up of extreme R, G and B values. This will ensure your highlight can go as dark or light as you need it to.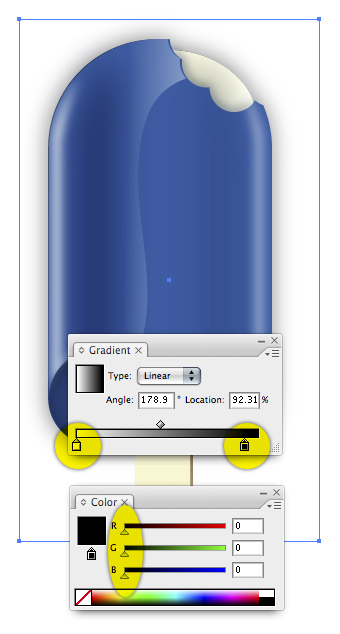
Step 35
It’s easy to add some drips and splatters to the illustration using Illustrator’s built-in ink options. Go to Window > Brush Libraries > Artistic > Artistic_Ink. Click and drag any of the ink options onto your document.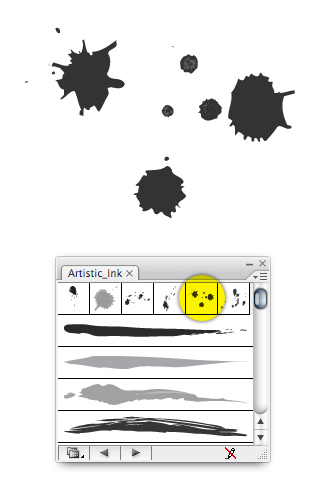
Step 36
In order to change the fill color of the ink splatters you’ll need to ungroup the splatter. Go to Object > Ungroup. Continue to ungroup the object until it can no longer be ungrouped. This will usually take about 4 times. Select the ink splatter and give it a radial gradient. Now the ink splatter looks like popsicle splatter.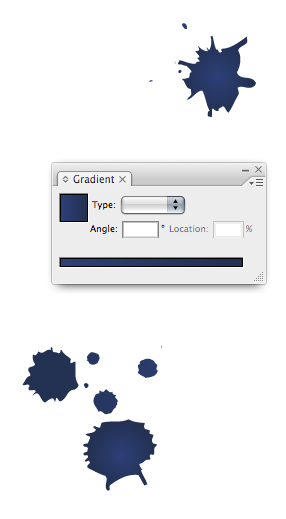
Step 37
Now we’ll make the drops of water. First draw a shape using the Pen Tool, as shown below. Blur the shape by going to Effect > Blur > Gaussian Blur…
Step 38
After you blur the shape, just draw a top and side highlight and give them a tenuous blue to white fill. That’s it!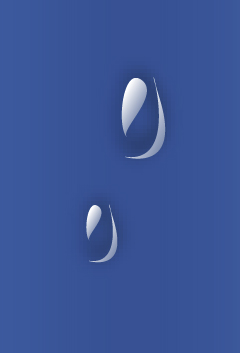
Step 39
To make sprinkles use the rounded corner rectangle tool. Leverage Illustrator’s built-in swatches to quickly apply different colors to the sprinkles. To access the built-in swatches go to Window > Swatch Libraries > Gradients > Brights.
Step 40
To create the background draw a rectangle and fill it with a bright gradient.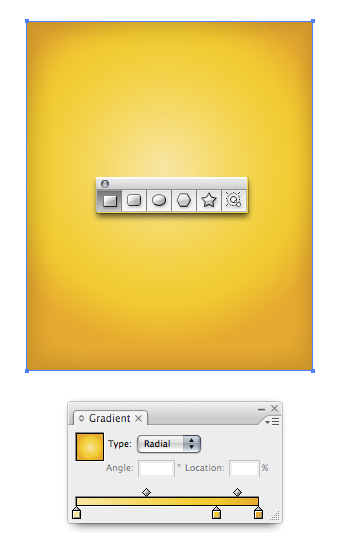
Step 41
Select the rectangle and go to Object > Envelope Distort > Make with Warp. Select Inflate and change the Bend slider to about 20%. Click OK.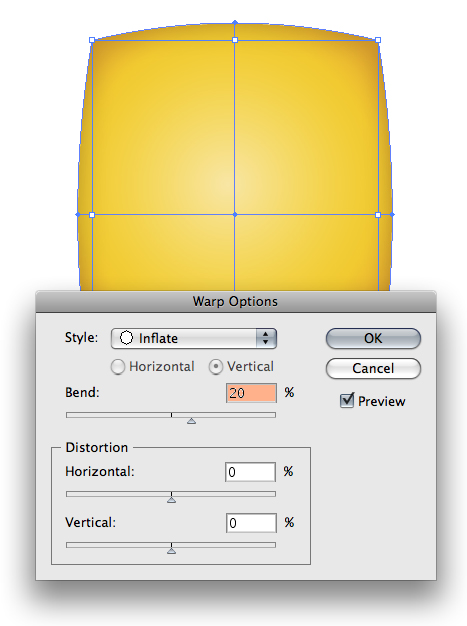
Step 42
Give the stick a shadow by duplicating the stick shape and giving it a blur. In the Transparency Palette Select Multiply so the shadow will blend well with the background.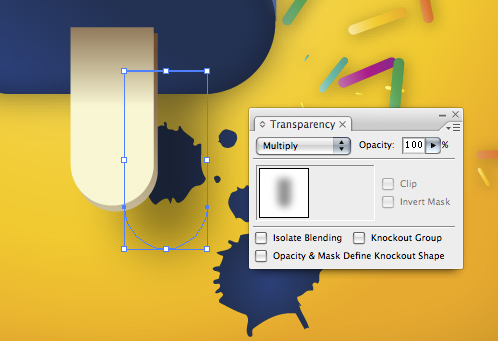
Step 43
Duplicate the basic shape that comprises the popsicle and use the same technique as the previous step with the exception of applying a blur. Blur is generally associated with shadows while a solid shape is usually indicative of a reflection. What we’re aiming for on this step is to create a reflection.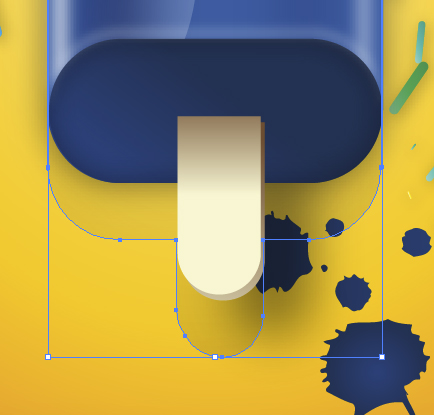
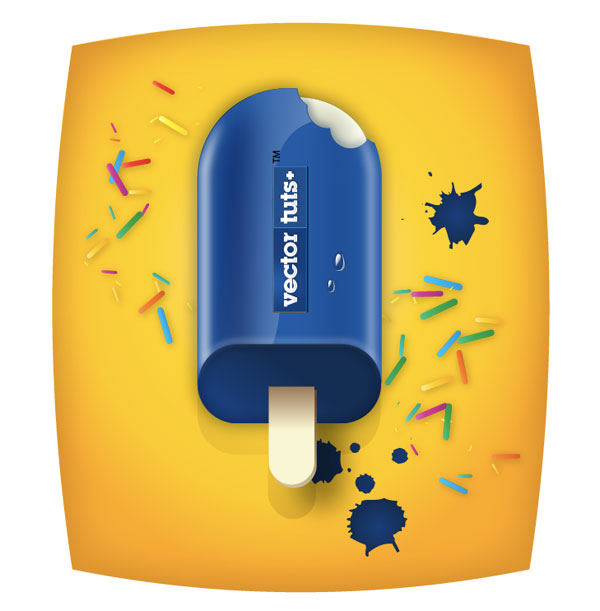
Final Image Preview
Presto, observe the final popsicle illustration!