
Step 1
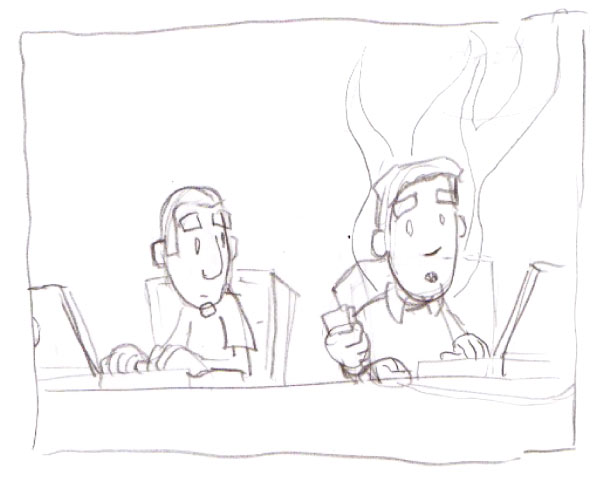
Before opening up Illustrator start with a quick pencil sketch. We’re going to use the Pen Tool to trace over the lines to give the cartoon a polished feel. The sketch doesn’t have to be perfect, it’s just a point to work from.Import the scan onto the artboard and then set the transparency to about 25%. The transparency makes it easier to see the lines you’re drawing on top of the sketch.
Step 2
Before we start tracing, we’re going to create a set of brushes that will give the outlines a more traditional ink look. I used the Pen Tool to make some shapes that look like rough lines. The width is varied in spots to give the strokes a personality.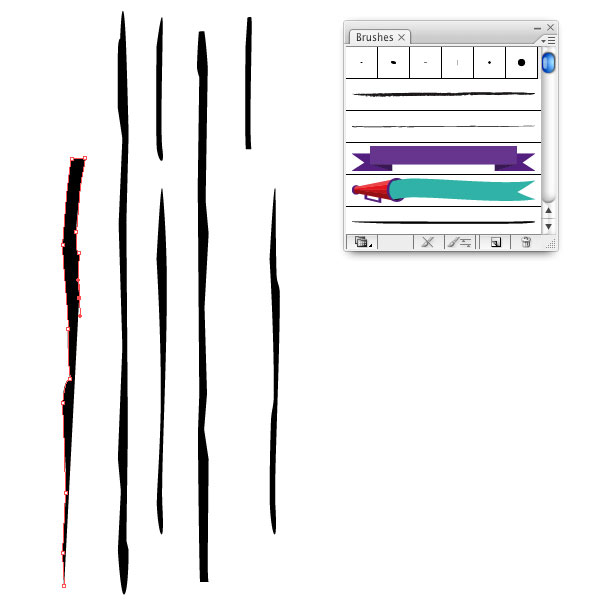
Step 3
Once your happy with some of the line shapes, convert them to brushes. Start by selecting the shape, then go to the drop-down menu of the Brushes Panel and select New Brush. There are four brush options. We’re going to make an Art Brush. Once you select Art Brush there are more options, but we just need the default settings.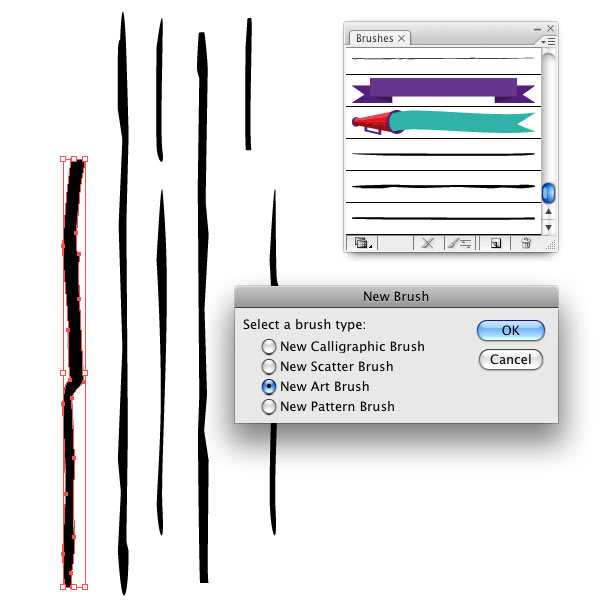
Step 4
When we start tracing with the Pen Tool we have the Stroke set to black with no fill color. There are a couple exceptions, the eyebrows have a fill so that we don’t have to break the line around the character’s head.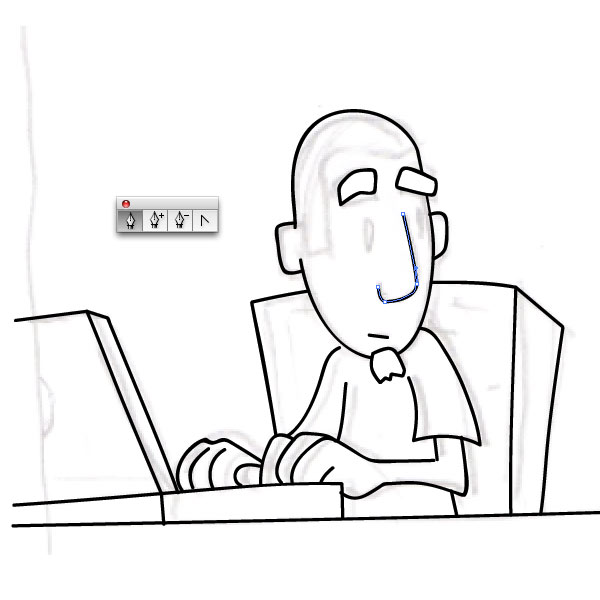
Step 5
Once you get a couple lines drawn, open up your brushes again (F5). Add some of the custom brushes we made earlier to the strokes. This is trial and error. On shorter strokes some of the more detailed brushes might not look right. You can adjust the weight of the strokes to give some elements more importance.In the example below, I added a thicker line (2 pt stroke) around the head and a lighter stroke (0.6 pt stroke) to the chair to draw attention to the more important elements.

Step 6
Once all the strokes are drawn in, it’s time to add some color. Start by creating a new layer under the strokes. Then using the Pen Tool to start outlining the shapes on that new layer. It’s not a bad idea to lock the layer that your strokes are on so that you don’t accidentally close shapes while adding color.You can move fast coloring because the black stokes hide the edges of your color so you don’t have to be super exact with your points. We’re using solid colors on these examples, but gradient color fills can look really sharp if used right.

Step 7
On a new layer you can add more detail. Here I’m using darker shades to add a little depth to the flat color.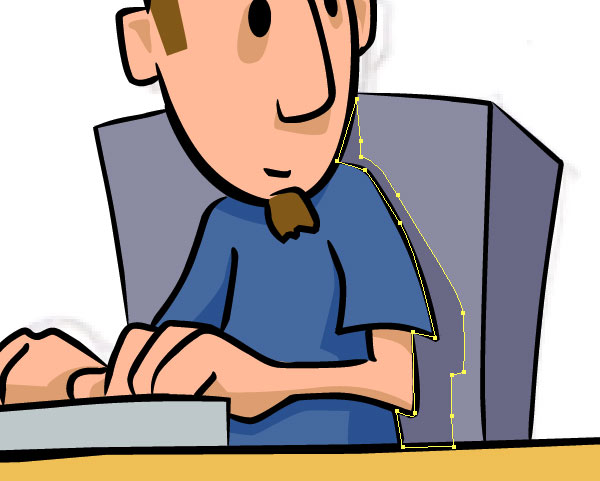
Step 8
This is usually where I start deviating from the sketch and add some personality. Brad Dielman (the character on the right) just looked funnier when I made his hair bigger and his eyebrows disjointed. The smoke and burnt spots are black fills with the transparency set between 10% to 15%.
Step 9
What’s a comic without words bubbles? I like nice symmetrical shapes so I used the Ellipse Tool (L) to draw a shape. Add three points to the bottom of the ellipse and drag down the middle of those three points down towards the character who’s talking. Use the Anchor Point Conversion Tool (Shift + C) to bring our talking bubble to a point. After the shape looks good, add one of your custom brushes to the shape.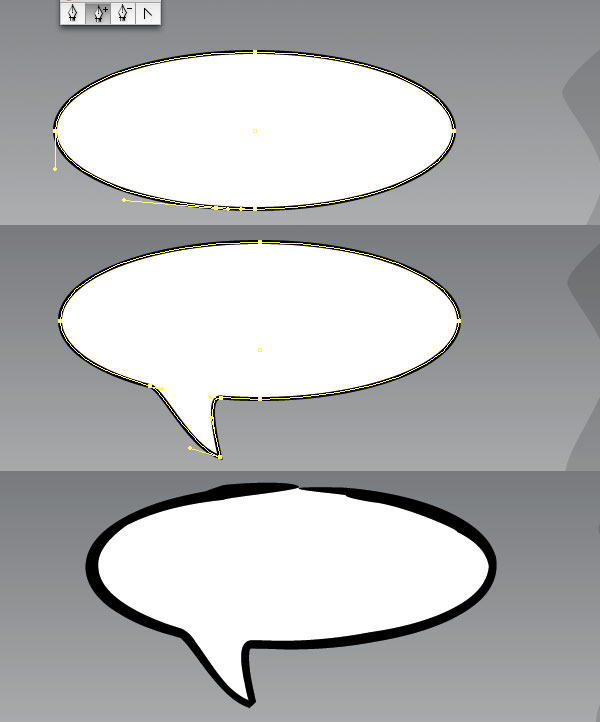
Step 10
Now lets add some Text. There are some great comic fonts out there, Comic Sans isn’t one of them so I’m using Samovrava for the text.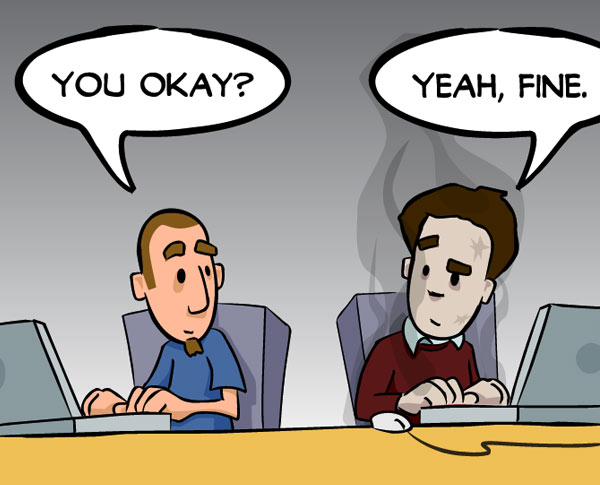
Step 11
That gives us one frame, five more to go. For this strip I use the same base artwork for each frame, then I modify the parts I need to tell the story. Once all the frames are drawn, I need to align them and add borders to each.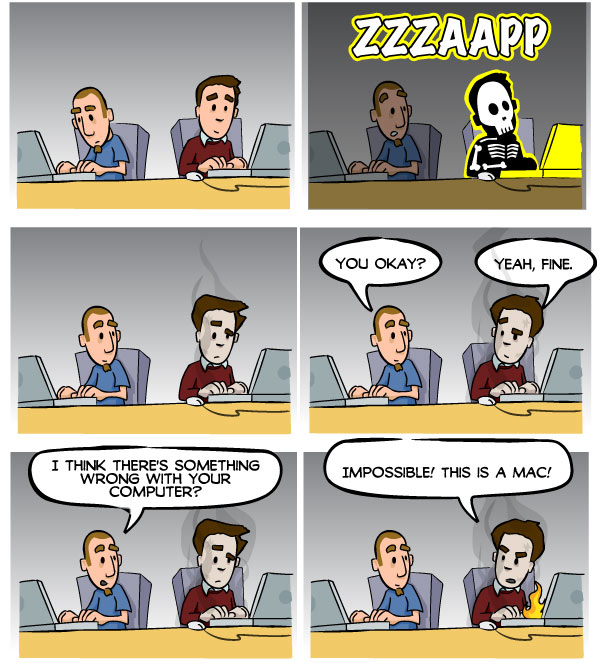
Step 12
As you can see, the edges are still sloppy. We’re going to use a clipping mask to clean up the artwork. To make a mask all the shapes and strokes need to be grouped, before doing that it’s a good idea to duplicate your artwork. Once you group a bunch of shapes, they all get pulled into one layer, which makes it difficult to change down the road.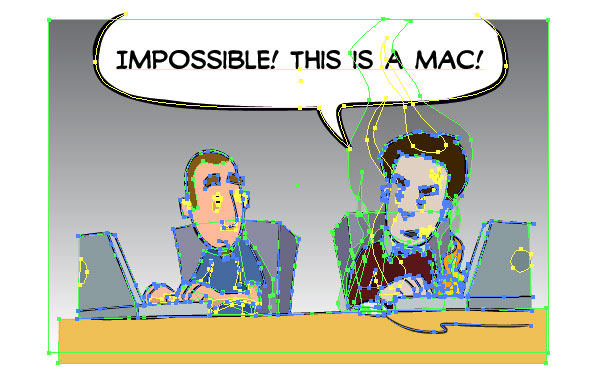
Step 13
Highlight all the shapes and strokes in one frame and group them (Command + G). Next, draw a box over the top of that group. Below you can see I changed the transparency of that box so I could see the artwork underneath. Select your grouped artwork and the shape you drew over it, then make them into a mask (Command + 7).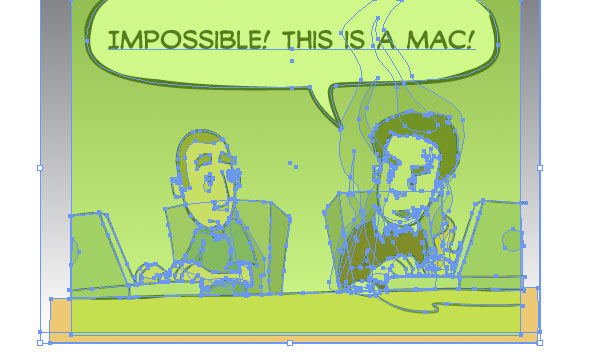
Final Image
The mask will crop out all the overlying shapes and give the panel a nice clean edge. Then you can add a border to it by drawing another square over the artwork and adding one of the brushes to the stroke.